Tutorial
Your first bulk edit, step by step
A complete walkthrough of a real bulk edit: raise prices by 10% and add a tag to three products, review the preview, apply and restore. All screenshots are from ZENBULK EDITOR running in a Shopify development store.
Step 1: Open ZENBULK EDITOR in Shopify admin
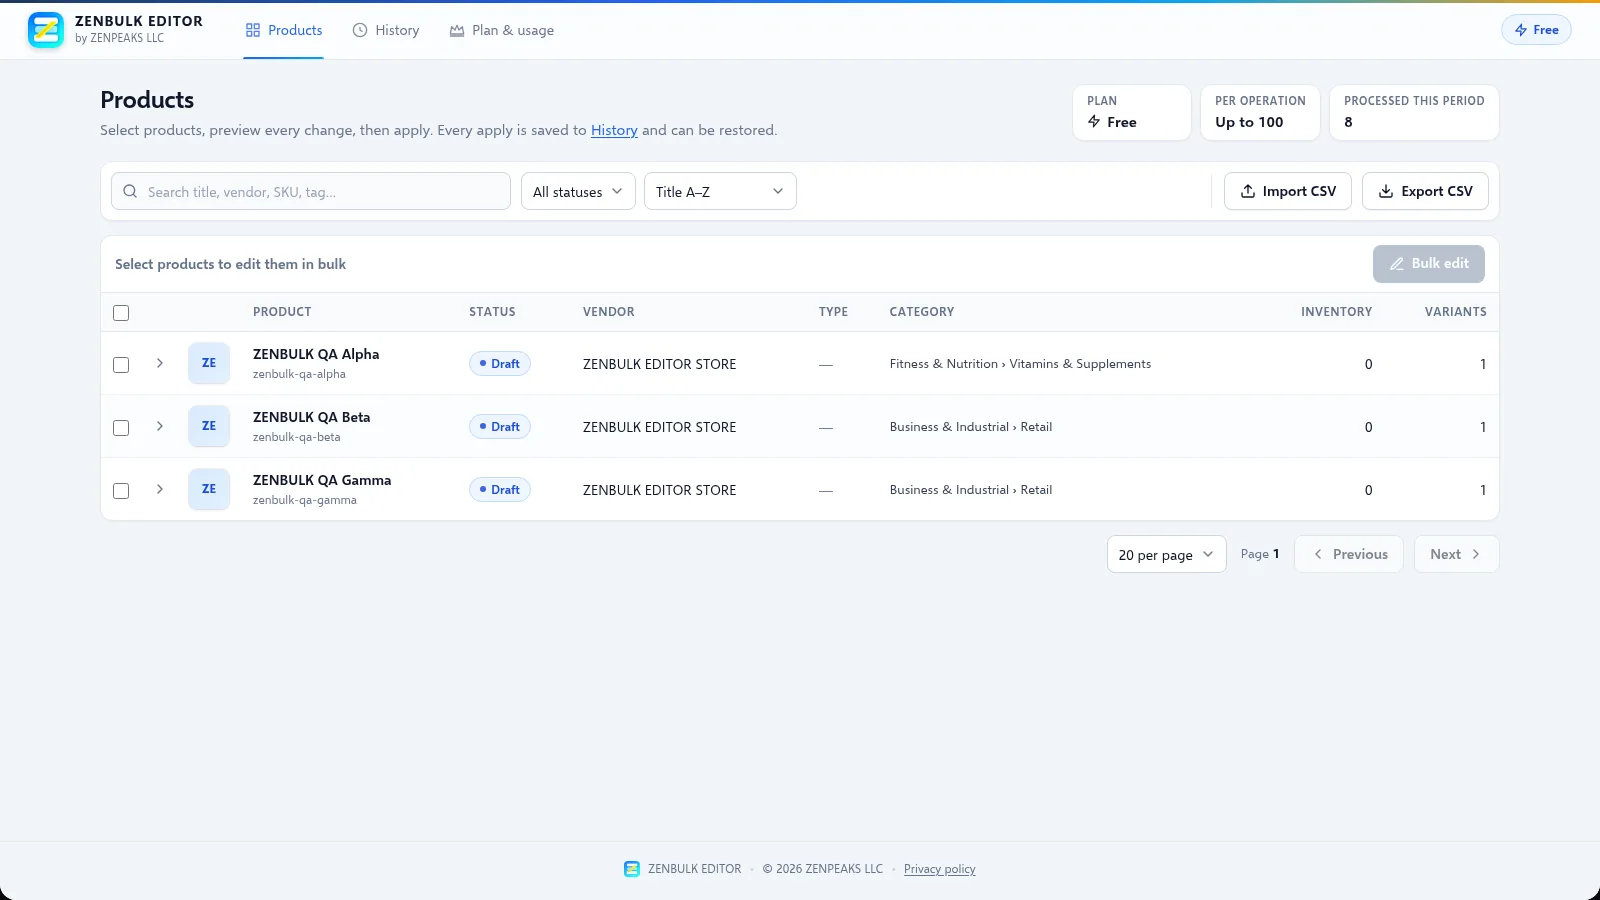
Open Apps → ZENBULK EDITOR in Shopify admin (or enter your store on the homepage). The Products page loads your catalog with your current plan and usage at the top.
Step 2: Select the products to change
Narrow the list with search, the status filter or sorting, then tick the products you want. The header checkbox selects every product on the page. Expand a product to tick individual variants. When products are selected, the Bulk edit button becomes active.
Step 3: Choose fields and rules
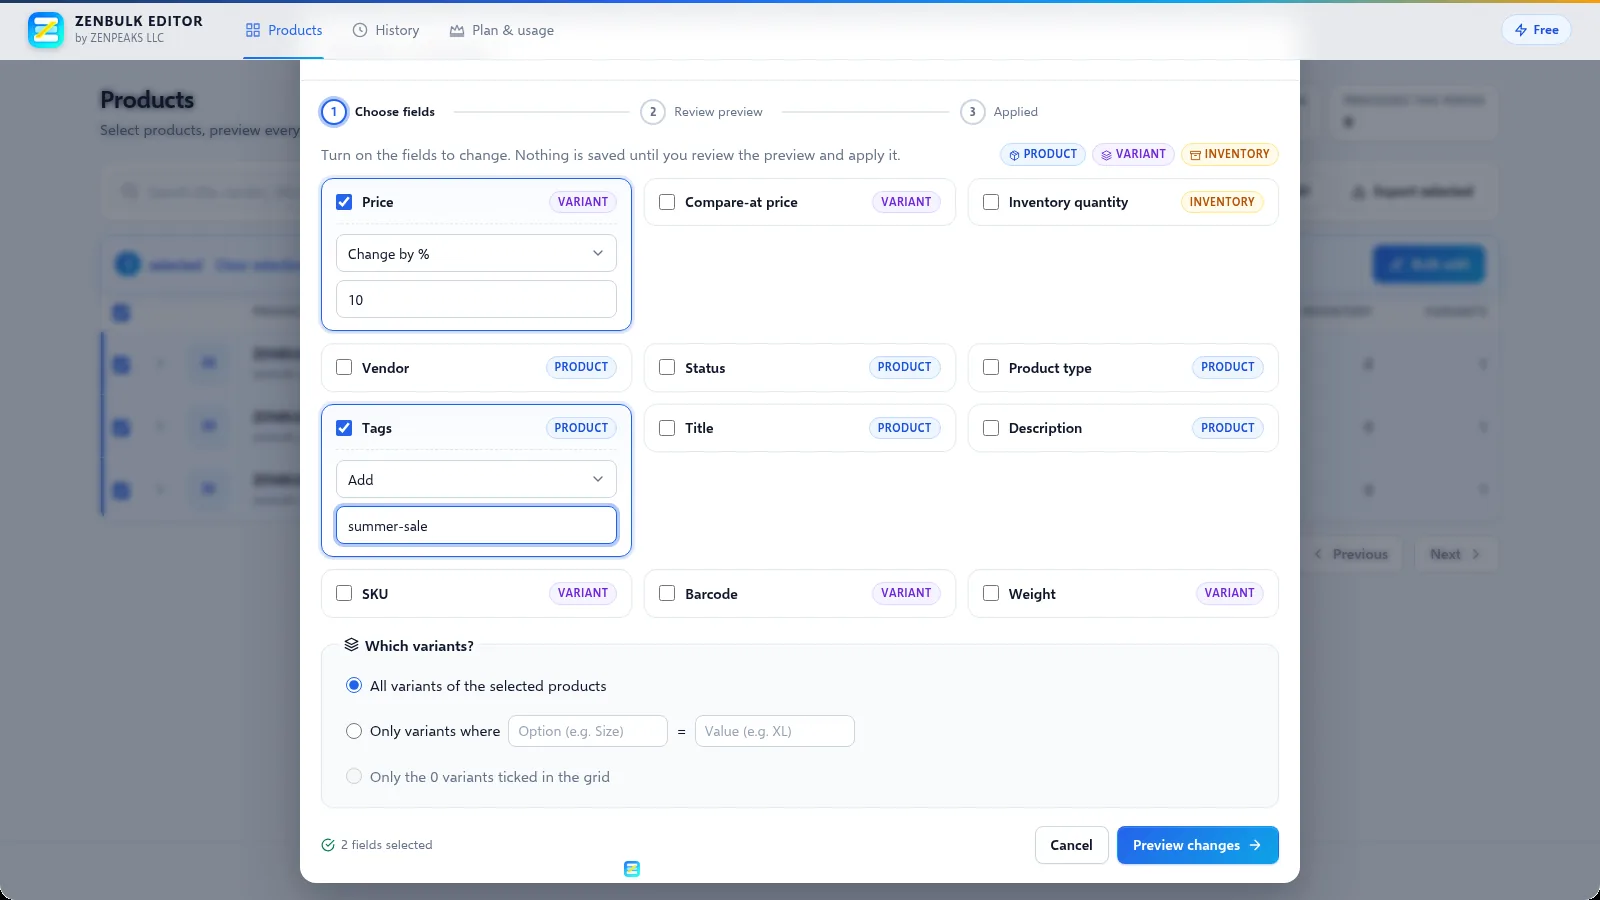
Click Bulk edit and turn on the fields to change. In this example, Price is set to Change by % with
10, and Tags is set to Add withsummer-sale.For variant fields, choose whether the change applies to all variants, only variants matching an option value, or only the variants you ticked.
Step 4: Review the preview
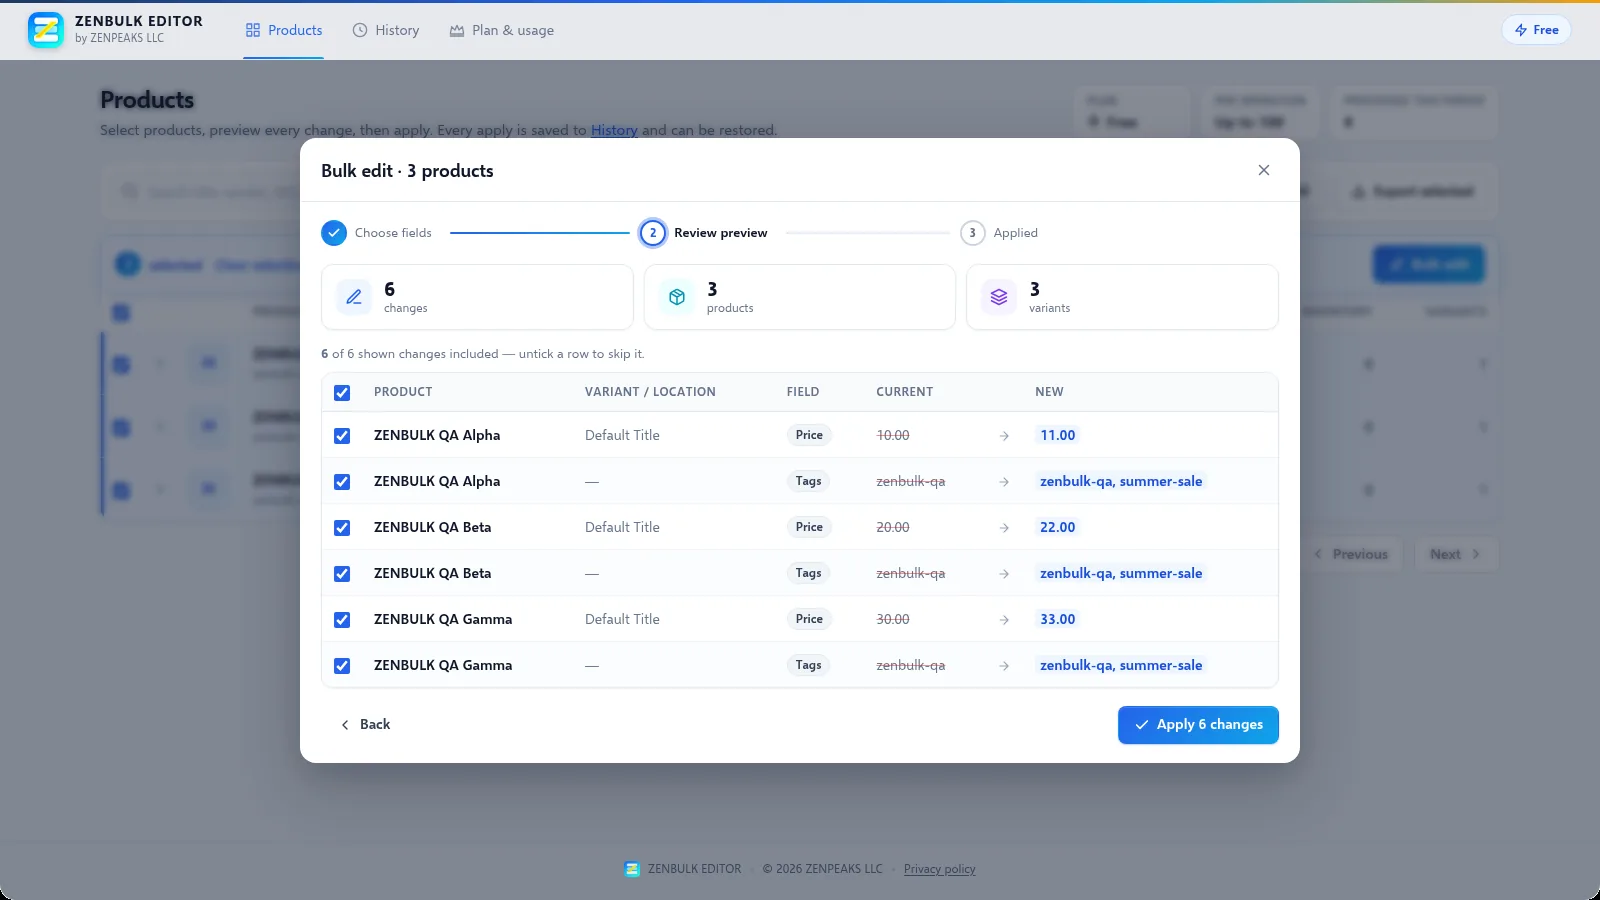
Click Preview changes. Each row shows the product, variant, field, current value and new value — here prices go from 10.00 to 11.00, 20.00 to 22.00 and 30.00 to 33.00, and the new tag is added. Untick any row you want to skip.
Step 5: Apply the changes
Click Apply. Small batches finish immediately; large ones run in the background with a progress bar. The result shows how many changes were applied and lists the reason for any change that failed. The batch is saved to History automatically.
Step 6: Restore from History if needed
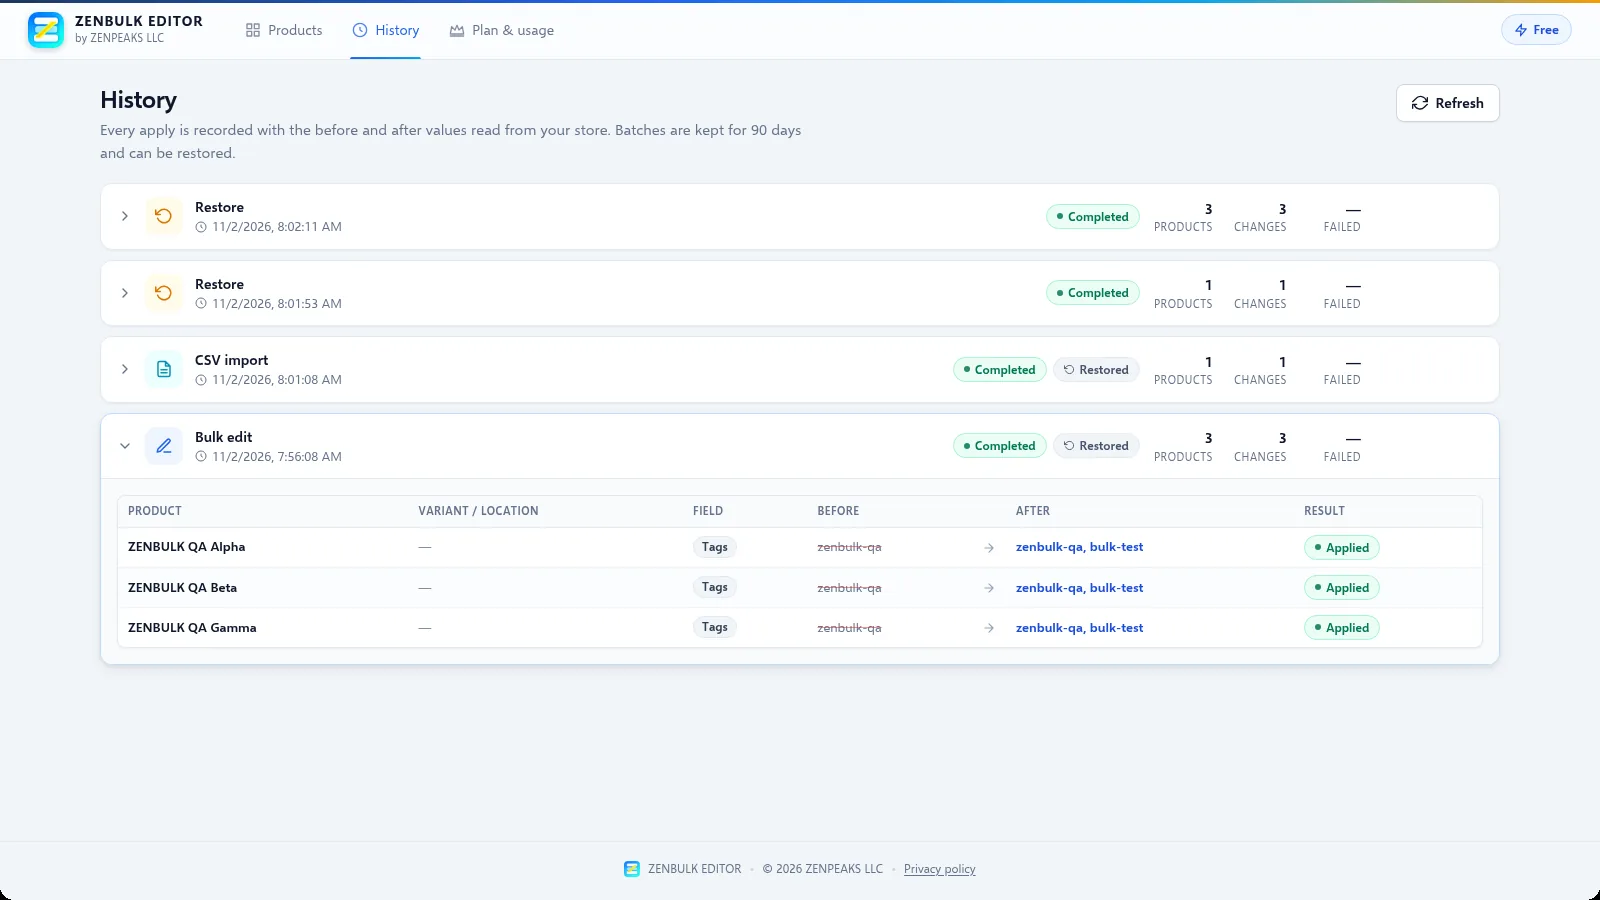
Open History to see every batch with its status and counts. Expand a batch to see before and after values. To undo it, click Restore on the batch and confirm — the previous values are written back and the restore is recorded as its own batch.
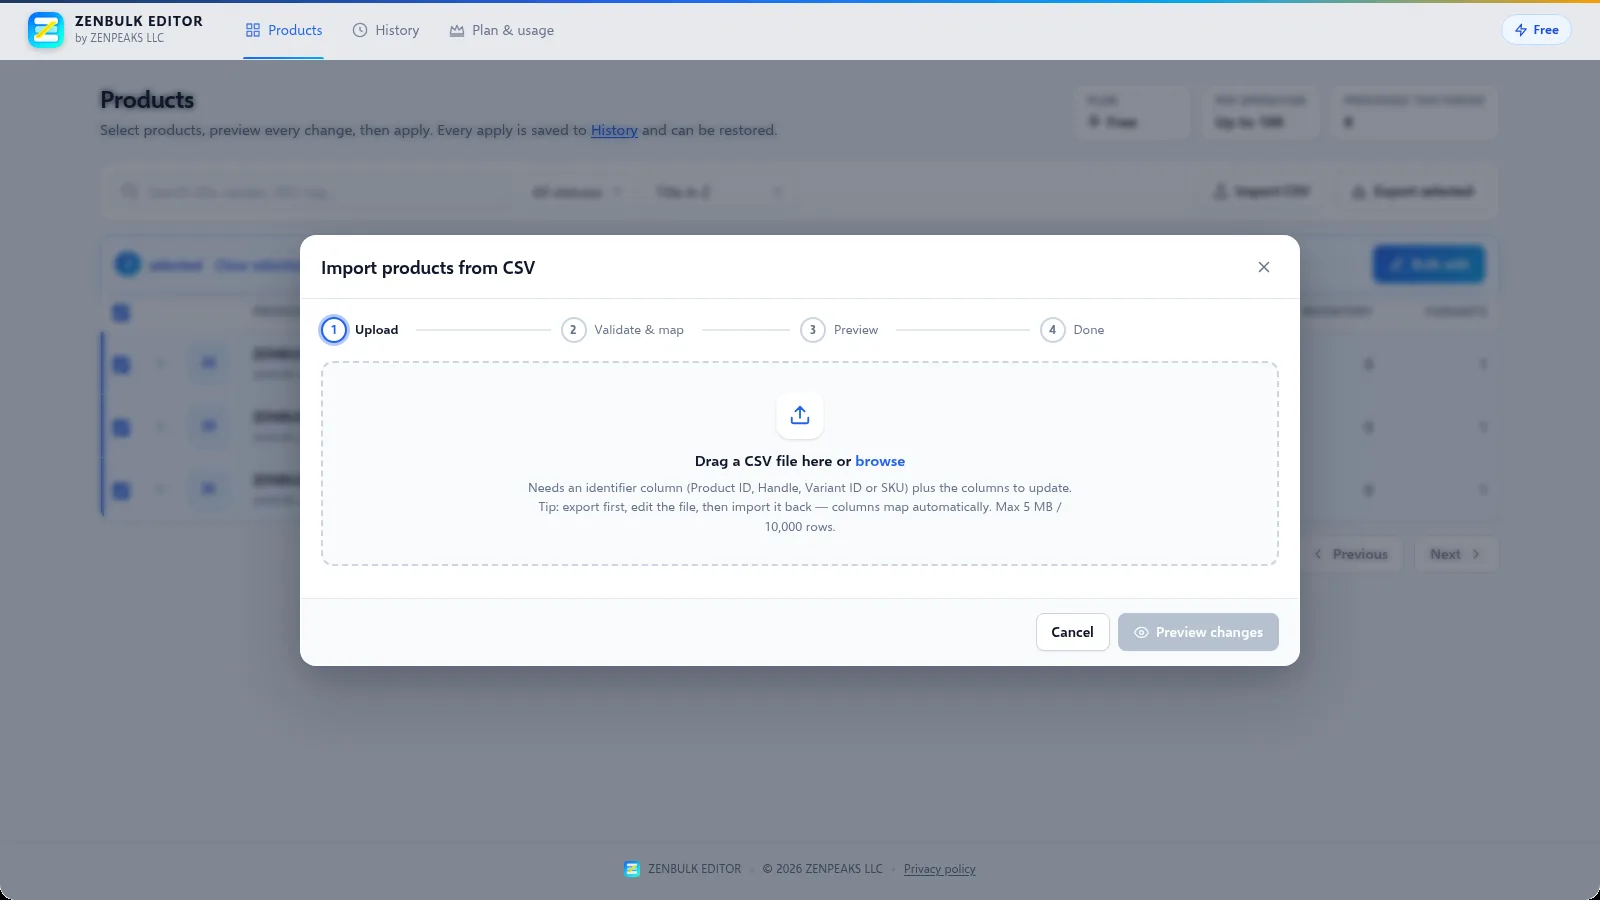
Step 7: Bonus: edit in a spreadsheet with CSV
Click Export CSV, edit the file in your spreadsheet tool, then use Import CSV to upload it. The app validates every row, maps columns automatically and shows a preview of real changes before you confirm.